We use cookies and similar technologies to improve user experience, and analyse activities and performance. For more information, please see our Privacy Policy. 
Recipe Detail Page
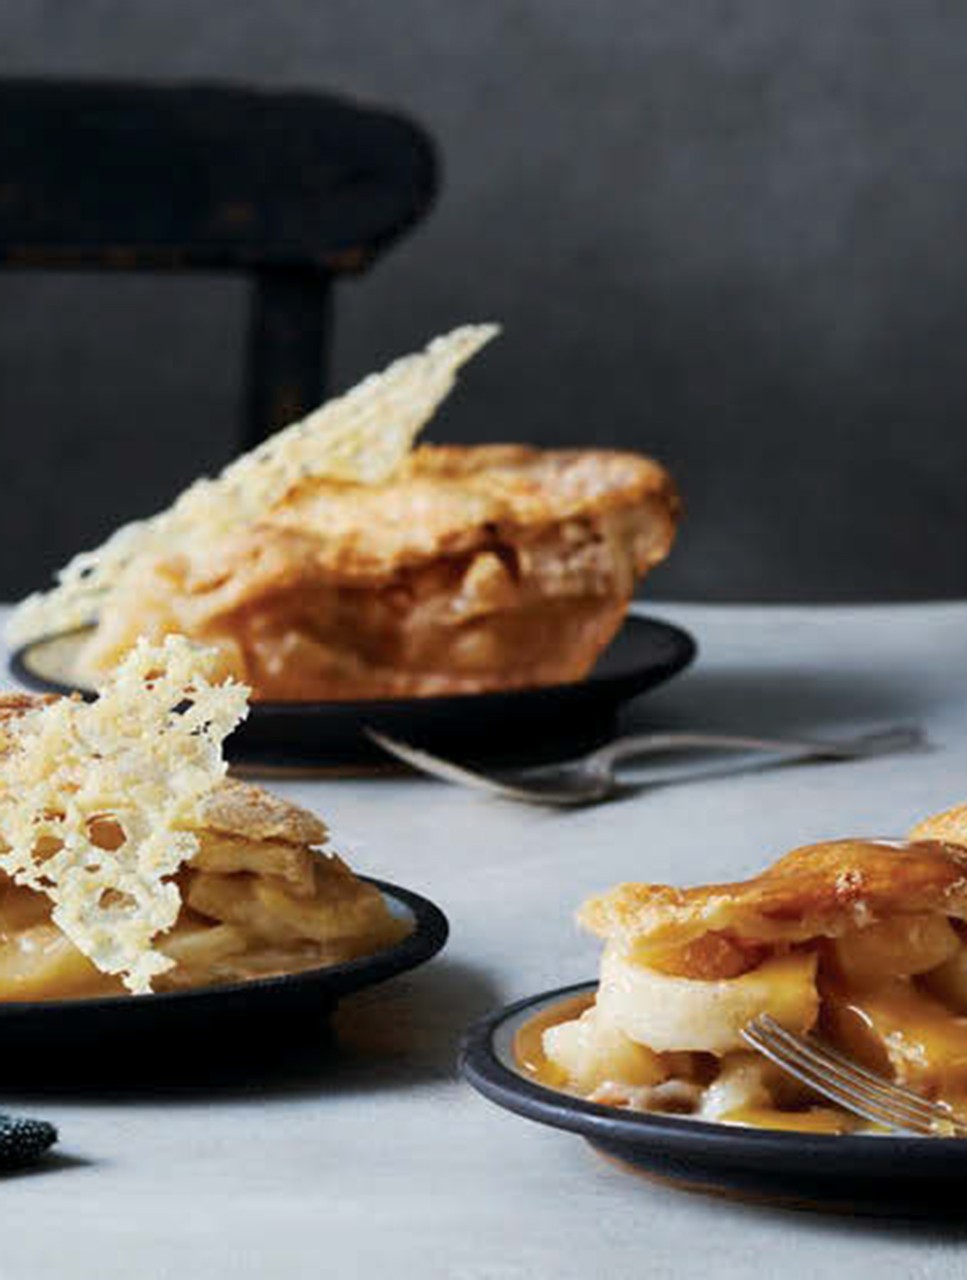

The Ultimate Apple Pie
Autumn 2019
A buttery, easy-to-make pastry is piled deep with apples and baked up in all its golden glory—as apple pie should be. The combination of tart and sweet apples does add depth to apple flavour. My personal favourite (after many combo tests) is 2 Northern Spy, 2 Ida Red and 2 Fuji or Ambrosia. If you prefer a tart-flavoured filling, use all tart apples or decrease the sugar to 1/2 cup (125 mL). If you prefer a firmer texture in your apples and/or a lighter coloured pastry, bake for the lower end of the time range (though the bottom may not be as crisp). When testing for doneness, keep in mind the apples will continue to soften slightly as the pie cools. The apples will collapse on cooling so don’t be alarmed. Preheat the oven well to get the best kick-start for flaky well-cooked pastry.
Serves 8
PASTRY
¾ cup (175 mL) cold unsalted butter
¼ cup (60 mL) cold shortening
2¼ cups (560 mL) all-purpose flour (measured by spoon and sweep method) plus extra for flouring
1 tbsp (15 mL) granulated sugar
½ tsp (2 mL) salt
½ cup (125 mL) ice water (approx.)
FILLING
2/3 cup (150 mL) granulated sugar
3 tbsp (45 mL) all-purpose flour
½ tsp (2 mL) ground cinnamon
1/8 tsp (0.5 mL) salt
2 tbsp (30 mL) fresh lemon juice
2 lbs (905 g) tart cooking apples, about 4 large (see below)
12 oz (340 g) sweet apples, about 2 medium (see below)
TOPPING
2 tsp (10 mL) cream (any type) or milk
Granulated sugar (optional)
Ground cinnamon (optional)
1 Place butter and shortening on a freezer-safe plate and freeze for at least 30 minutes, until firm, or for up to 1 day.
2 Combine flour, sugar and salt in a large bowl. Grate frozen shortening on large holes of a cheese grater, then toss with a fork to coat fat pieces in flour. Repeat with half the butter, tossing to coat, then grate in remaining butter. Work gently into flour with fingers, just until pieces of fat are coated in flour and they start to look like dry large-flake oats (see TIP 1).
3 Drizzle in ice water while stirring with a fork. The dough should start to clump together. If it looks dry, stir in more water, about 1 tsp (5 mL) at a time, just until you can squeeze the dough together with your hands.
4 Gather dough together with hands into a rough ball (do not squeeze or work too much). Divide dough in half. Shape and press each half into a thick disc. Wrap tightly in plastic wrap or a resealable plastic bag and refrigerate for at least 30 minutes, until chilled, or for up to 3 days.
5 Preheat oven to 425°F (220°C) with the rack in the lowest position. Place a rimmed baking sheet on the lowest rack to preheat (this helps crisp the bottom crust and catches drips).
6 Lightly flour a rolling mat or a large sheet of parchment paper and lightly flour a rolling pin. Roll out 1 disc of pastry, lifting and lightly flouring underneath, as necessary to prevent sticking, to a 14-inch (35-cm) circle. Transfer to a 9 1/2-inch (24-cm) deep-dish glass pie plate (see TIP 2), gently but neatly fitting into the bottom edge of the plate and letting excess overhang edge of pie plate. Trim edge with a sharp paring knife or scissors, leaving 1-inch (2.5-cm) overhang beyond the inside edge of the pie plate. Refrigerate while preparing to fill.
7 For the filling, combine sugar, flour, cinnamon and salt in a small bowl.
8 Place lemon juice in an extra-large bowl. Peel tart apples and cut them into quarters. Trim out cores, then cut into thin slices, just under 1/4 inch (5 mm) thick. Add to the lemon juice, tossing gently to coat. Repeat with the sweet apples. Sprinkle sugar mixture over apples, gently tossing with a spatula to evenly coat.
9 About one-third at a time, pour apples into the bottom pastry crust, then use your hand to gently pack the apples so they’re even and compact and slightly mounded in the pie plate. Set aside.
10 Roll out the second disc of pastry to a 14-inch (35-cm) circle. If desired, cut out a decorative shape, such as an apple, from the centre of the circle, making sure it is no larger than 2 inches (5 cm). Reserve the cut-out shape. Brush edge of bottom crust with water. Roll up the circle of pastry around the rolling pin, then carefully unroll to drape over filled pie, centring the pastry over the filling.
11 Trim edge of the top crust so that it extends about 1/4 inch (5 mm) beyond the edge of bottom crust. Reserve scraps for decorative shapes (or make a jam turnover for snacking on while the pie cools). To seal crusts, lift a small portion of both edges so they are almost vertical and fold the top crust over the bottom crust making about a 3/4-inch (2-cm) fold, pinching together to seal and pressing to thin slightly, lifting to make a raised rim. Repeat all the way around the pie.
12 Use the forefinger and thumb of one hand to gently press the raised rim of the pastry from the inside toward the outside while bracing the rim with the other thumb (on the other side of the pastry) to create a fluted edge. Keep the fluted edge angled up and just inside the edge of the pie plate to reduce any spillover during baking.
13 For the topping, brush the top crust with cream or milk, leaving the fluted edge bare (so it doesn’t get too brown too quickly). Place any decorative cut-outs on top crust and brush them with cream. With the tip of a paring knife, cut several small vents around the top crust. Sprinkle with sugar and/or cinnamon, if desired. (You can leave the top crust plain if you prefer.)
14 Place the pie on the preheated baking sheet on the lowest rack and bake for 25 minutes. Reduce oven to 375°F (190°C) and bake for 40 to 55 minutes longer or until apples are desired tender, the filling is bubbling and thickened, and pastry is browned and crisp. Let cool on a wire rack for at least 4 hours until room temperature and set.
TIP 1 If you prefer, instead of grating the frozen fat, you can cut butter and shortening into cubes and freeze for 10 minutes, then cut into flour mixture using a pastry blender, or use a food processor, pulsing or cutting until the largest pieces of butter are the size of small peas.
TIP 2 If using a dark metal pie plate, be sure it is at least 1 1/2 inches (3.5 cm) deep. The baking time will be in the lower range. A deep ceramic pie plate will bake in the upper end of the time range and may take a few minutes longer.
Serves 8
MAPLE TOFFEE DRIZZLE
This sweet, creamy syrup is reminiscent of the tire sur la neige enjoyed at a cabane à sucre in early spring and is a decadent garnish for autumn baking. Drizzle it warm over a slice of The Ultimate Apple Pie, a gingerbread cake or a bowl of ice cream.
3/4 cup (175 mL) pure maple syrup
1/4 cup (60 mL) whipping cream
1 tbsp (15 mL) butter
1 Pour syrup into a small saucepan and bring to a boil over medium-high heat. Reduce heat enough to maintain a steady boil and boil, stirring occasionally to knock down bubbles, for about 5 minutes or until bubbles start to turn foamy and syrup is slightly thickened when you drizzle it from a spoon (watch carefully as it will bubble up).
2 Carefully pour in whipping cream, while stirring. Return to a boil. Boil, stirring, for 3 minutes or until slightly thickened. Remove from heat and stir in butter until melted. Transfer to a heatproof measuring cup or bowl, place plastic wrap directly on the surface and let cool until just warm and thick. Do not stir while it cools as that can cause it to crystalize. (Syrup can be cooled and refrigerated in an airtight container for up to 1 week. Warm in a saucepan over medium-low heat just until fluid before serving.). Drizzle over each slice of pie.
Makes about 3/4 cup (175 mL)
Ever wondered about the secrets to making the perfect apple pie? Our intensive step-by-step guide with tried-and-true tips will show you how—and give you two toppings to end all toppings.
Apple pie is one of those recipes everyone should have in their repertoire, so here’s your guide to mastering this classic. We all have our own perception of what makes an apple pie “the ultimate.” Tart apples, sweet apples or a mixture, softly cooked filling or firm apples that hold their shape, a hint of cinnamon or lots of spice. Most agree the pastry should be flaky and tender, though some prefer it pale golden while others covet a deep golden, crispy crust. Surely we can all agree it should not have a soggy bottom! Paramount to all of that, the ultimate pie should put the spotlight on orchard-fresh apples. Follow our step-by-step tutorial and recipe for the confidence to try it for the first time, or hone your skills and customize as you wish and you’ll be vying for star baker status in no time.
The Crust
Roughness causes toughness. For the flakiest baked texture use gentle pressure when stirring, handling and rolling pastry and avoid mashing or letting your hands warm it.
1 Spoon flour into dry measuring cups and level off the top. Combine dry ingredients in a large bowl. Hold cheese grater over bowl and grate in frozen shortening and butter in 3 additions, tossing the flour mixture with a fork between each.
2 Gently toss with fingers to evenly combine. The pieces of fat should look like dry, large-flake oats.
3 Drizzle in ice water while stirring with a fork until evenly moistened. Don’t mash or overwork it! If necessary, add more water a bit at a time just until dough clumps.
4 Gently gather the ragged dough into a ball with hands, then break in half and form 2 balls (weigh dough or eyeball it).
5 Flatten each into a thick disc (ragged edges are okay). Wrap well in plastic and refrigerate until chilled. Preheat the oven before rolling out the bottom crust.
6 Place 1 disc on a lightly floured surface. Flour rolling pin. Starting at the centre of the disc for each stroke, with light pressure on the rolling pin, roll toward the edge, lifting the pin as you get to the edge to avoid pressing the edge too thin. Lift the dough and lightly flour underneath occasionally to prevent sticking.
7 Roll out in each direction like the points of a compass to form a neat circle of the desired size. Roll up a circle around the pin, then drape into a pie plate, gently lifting dough to fit snugly into the sides.
8 Trim edge, leaving about 1 inch (2.5 cm) of pastry overhang beyond the inner edge of pie plate. Refrigerate while making the filling.
The Filling
STEP 1 Slice peeled apples thinly. Thin slices of similar size compact better and cook more evenly. Sweet apples soften more so you can cut them a little thicker than firm apples if you’re combining varieties. Combine in a very large bowl with lemon juice. Combine dry ingredients in another bowl.
STEP 2 Sprinkle in sugar mixture while gently tossing apples with a spatula to coat apple slices evenly. Avoid breaking up the apples.
STEP 3 Pour about one-third of apples into chilled (unbaked) bottom crust. Using your hands, gently arrange and press apples to fit them snugly with as few gaps as possible. Repeat in two more additions. They should be compact and slightly mounded. Set aside while rolling top crust.
Final assembly
1 Roll out top pastry to desired-size circle, ensuring you have plenty of overhangs to seal the bottom crust. Brush edge of bottom crust with water.
2 Cut a decorative shape from the centre of the circle. Roll up a circle around the pin, then unroll to drape over filled pie, centring it.
3 Trim edge of the top crust so it extends about ¼ inch (5 mm) beyond the edge of bottom crust.
4 Fold top crust over the edge of the bottom crust, pinching the two together to seal and thin the edge out slightly, lifting to make a raised rim. You want a tight seal here.
5 Use the forefinger and thumb, on one hand, to gently press the raised rim of the pastry from the inside toward the outside, while bracing the rim with the other thumb (on the other side of the pastry) to create a fluted edge. Keep the fluted edge angled up and just inside the edge of the plate to reduce spillover during baking.
THE BEST APPLES
A combination of tart and sweet varieties adds depth of flavour to pie filling. Use just one variety if you prefer. Apple texture varies by growing season and upon storing, so you may find they bake up firmer or softer at times. Choose apples that feel heavy for their size to ensure juiciness and good flavour.
Tart, firm cooking apples that hold their shape include Northern Spy, Cortland, Crispin, Ida Red, Spartan and Granny Smith.
McIntosh is a tart apple that softens dramatically when baked.
Sweet apples that hold their flavour when baked include Fuji, Ambrosia, Golden Delicious, Pink Lady and Honey Crisp.